Introduction
Node.js is a powerful JavaScript framework for creating web applications, while Docker is an excellent solution for packing and deploying software. Combining these two technologies helps create a scalable and consistent environment to streamline web application deployment.
This article will show how to build a Node.js app with Docker.
Prerequisites
- A system running Ubuntu (the guide uses Ubuntu 24.04).
- Access to an administrator account.
- Docker installed.
- Node.js and npm installed.
- A Docker Hub account.
Step 1: Create a Project and Install Dependencies
To create an image, start by making the Node.js project directory and installing dependencies:
1. Create a directory and enter the location using the cd command:
mkdir my_project && cd my_projectThe my_project directory is the root directory of the Node.js application. If you use a different name, adjust it in all subsequent commands.
2. Create a package.json file using an editor such as nano:
nano package.jsonThe file provides a simple way to manage Node.js dependencies and project information.
3. Add this code to the file:
{
  "name": "nodejs-docker-kb-demo",
  "version": "1.0.0",
  "description": "Node.js Docker KB demonstration",
  "author": "Your Name <[email protected]>",
  "license": "MIT",
  "main": "app.js",
  "keywords": ["nodejs", "kb", "docker"],
  "dependencies": {
    "express": "^4.16.4"
  }
}
The file now has the following data:
name. The project name that gets published to the npm Registry. Use a short, descriptive, and unique name.version. The project's version number.description. A short description of the project.author. The project creator.license. Set to MIT to allow free use and distribution. Adjust to a different license if necessary.main. Defines the project's entry point (an app.js file).keywords. The project's keywords, which npm indexes.dependencies. Lists the dependent package (express) and version.
4. Save the package.json file and close nano (CTRL+X, Y, Enter).
5. Install the project's dependencies with:
npm install
The command installs the packages listed in the dependencies field in the package.json file.
Step 2: Create App Structure
This step creates a simple web application that provides information on phoenixNAP's Bare Metal Cloud (BMC) servers. The project directory consists of the following files:
- app.js file. The main entry point that contains all project routes.
- views directory. Contains the following static pages for the web application:
- index.html file. The landing page with simple information about BMC servers, which links to a more detailed page.
- bmc.html file. The detailed page with additional information.
Follow the instructions below to create the application structure.
Create Routes and Mount Assets
The following steps create the project routes and mount the project assets. Routing allows linking requests to the correct paths and corresponding pages.
1. In the project directory (~/my_project), create the main entry point file:
nano ~/my_project/app.js2. Define the project constants. Add the following code to the app.js file:
const express = require('express');
const app = express();
const router = express.Router();
const path = __dirname + '/views/';
const port = 8080;
The code does the following:
- Line 1 loads the Express module, which the following two lines use to create backend objects.
- Lines 2-3 create the Express
appobject, which gives access to create a Router object. The Router object helps define HTTP method routes and how the app handles requests. - Line 4 defines the default path for the project's pages as ~/my_project/views/.
- Line 5 sets the default listening and bind port as
8080.
Keep the file open and proceed to the next step.
3. Add the project routes with the following code:
router.use(function (req,res,next) {
  console.log('/' + req.method);
  next();
});
router.get('/', function(req,res){
  res.sendFile(path + 'index.html');
});
router.get('/bmc', function(req,res){
  res.sendFile(path + 'bmc.html');
});
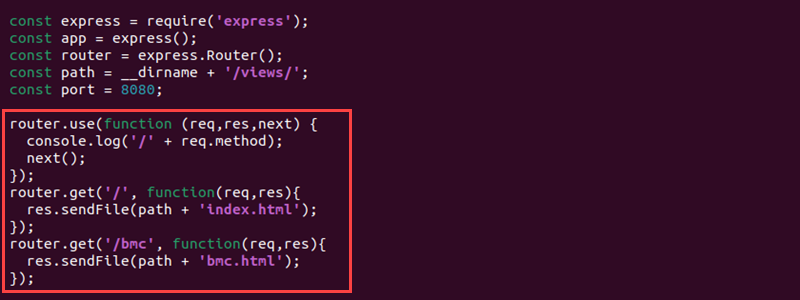
The code contains three router functions:
router.useis a middleware function that logs requests and forwards them to the app routes.router.getdefines two app routes as GET requests. The first defines the default route and links it to theindex.htmlpage, whereas the second defines the/bmcroute and links to thebmc.htmlpage.
4. Mount the assets and define the application launch:
app.use(express.static(path));
app.use('/', router);
app.listen(port, function () {
  console.log('Listening on port 8080')
})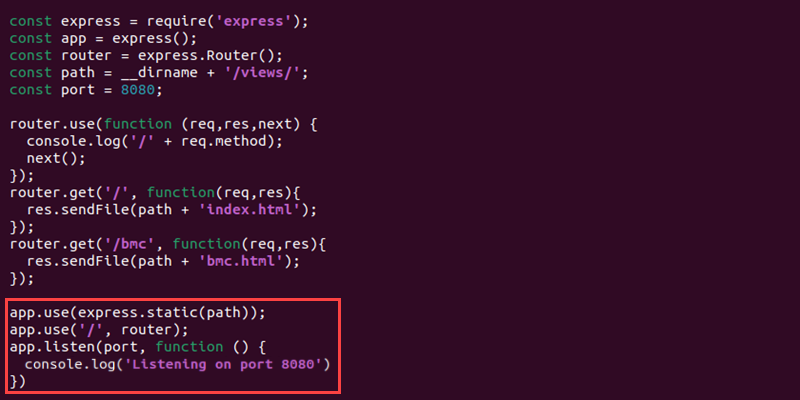
The application listens on port 8080 when launched.
5. The completed app.js file looks like the following:
const express = require('express');
const app = express();
const router = express.Router();
const path = __dirname + '/views/';
const port = 8080;

router.use(function (req,res,next) {
  console.log('/' + req.method);
  next();
});
router.get('/', function(req,res){
  res.sendFile(path + 'index.html');
});
router.get('/bmc', function(req,res){
  res.sendFile(path + 'bmc.html');
});

app.use(express.static(path));
app.use('/', router);
app.listen(port, function () {
  console.log('Listening on port 8080')
})
6. Save the file and close the editor.
Create Static Pages
The following steps provide a guideline and templates to create the index.html and bmc.html static pages:
1. Create a views directory inside the project root:
mkdir ~/my_project/views2. Create the landing page (index.html):
nano ~/my_project/views/index.html3. Add the following code to the file:
<!DOCTYPE html>
<html>
  <head>
    <title>About BMC</title>
    <meta charset="utf-8">
    <meta name="viewport" content="width=device-width, initial-scale=1">
    <link rel="stylesheet" href="https://maxcdn.bootstrapcdn.com/bootstrap/3.4.1/css/bootstrap.min.css">
    <script src="https://ajax.googleapis.com/ajax/libs/jquery/3.6.4/jquery.min.js"></script>
    <script src="https://maxcdn.bootstrapcdn.com/bootstrap/3.4.1/js/bootstrap.min.js"></script>
    <link href="css/styles.css" rel="stylesheet">
  </head>
  <body>
    <nav class="navbar navbar-default">
      <div class="container-fluid">
        <div class="navbar-header">
          <a class="navbar-brand" href="#">BMC Information</a>
        </div>
        <ul class="nav navbar-nav">
          <li class="active">
            <a href="#">Home</a>
          </li>
          <li>
            <a href="/bmc">BMC</a>
          </li>
        </ul>
      </div>
    </nav>
    <div class="jumbotron">
      <div class="container">
        <h1>Bare Metal Cloud</h1>
        <p>API-Driven Dedicated Servers</p>
        <a class="btn btn-danger btn-lg" href="/bmc">Learn more!</a>
      </div>
    </div>
    <div class="container">
      <h2>Up and Running in 60 sec. Hassle-Free Management. No hidden costs.</h2>
      <p>Setting up an enterprise-grade infrastructure should not be time-consuming and frustrating. With Bare Metal Cloud, you can deploy and manage high-performance physical servers with cloud-like ease and simplicity. No more waiting around for hours for your machine to be provisioned. Spin up pre-configured dedicated servers with a single API call or a couple of clicks. Pay by the hour or leverage monthly or yearly reservations to save up to 30% on your servers.</p>
    </div>
  </body>
</html>
The code contains several Bootstrap elements to create a sample responsive page. The navbar sets the home page as active and links to the current page and the /bmc route. An additional button on the page links to the /bmc page, too.
The code also contains a linked CSS stylesheet (styles.css).
4. Save the file and close the editor.
5. Create the bmc.html file with:
nano ~/my_project/views/bmc.html6. Add the following code to the file:
<!DOCTYPE html>
<html>
  <head>
    <title>About BMC</title>
    <meta charset="utf-8">
    <meta name="viewport" content="width=device-width, initial-scale=1">
    <link rel="stylesheet" href="https://maxcdn.bootstrapcdn.com/bootstrap/3.4.1/css/bootstrap.min.css">
    <script src="https://ajax.googleapis.com/ajax/libs/jquery/3.6.4/jquery.min.js"></script>
    <script src="https://maxcdn.bootstrapcdn.com/bootstrap/3.4.1/js/bootstrap.min.js"></script>
    <link href="css/styles.css" rel="stylesheet">
  </head>
  <body>
    <nav class="navbar navbar-default">
      <div class="container-fluid">
        <div class="navbar-header">
          <a class="navbar-brand" href="/">BMC Information</a>
        </div>
        <ul class="nav navbar-nav">
          <li>
            <a href="/">Home</a>
          </li>
          <li class="active">
            <a href="/bmc">BMC</a>
          </li>
        </ul>
      </div>
    </nav>
    <div class="jumbotron">
      <div class="container">
        <h1>Bare Metal Cloud</h1>
        <p>Additional information</p>
      </div>
    </div>
    <div class="container">
      <div class="row">
        <div class="col-lg-4">
          <h2>Run any workload</h2>
          <p>No hypervisor. Leverage the raw power of physical hardware and deploy pre-configured environments in minutes.</p>
        </div>
        <div class="col-lg-4">
          <h2>Automate everything</h2>
          <p>Script out infrastructure management and let automation do the heavy lifting. Focus on coding and releasing great software.</p>
        </div>
        <div class="col-lg-4">
          <h2>Scale at the edge</h2>
          <p>Effortlessly resize your infrastructure across the US, Europe, and Asia and bring your apps and workloads closer to your teams and users.</p>
        </div>
      </div>
    </div>
  </body>
</html>
The navbar changes the active page to BMC and links other navigation bar elements to the home page.
7. Save and close the file.
8. Create a separate directory for the CSS file:
mkdir ~/my_project/views/css9. Make the styles.css file:
nano ~/my_project/views/css/styles.css10. Add the following code to the file:
html{
	font-family: roboto;
}

.navbar {
	margin-bottom: 0;
}

.jumbotron{
	background: #2B2C7C;
	color: white;
	text-align: center;
}

.container{
	text-align: center;
}

h2{
	color: #2B2C7C;
	font-weight: bold;
}
11. Save the file and close nano.
Step 3: Run the Application
All files and dependencies for the project are ready. To run the application:
1. Enable traffic on port 8080. For example, if you use UFW, run:
sudo ufw allow 80802. Run the server with:
node ~/my_project/app.js
The terminal shows the server is ready and listening on port 8080.
3. Open a browser and access the page via localhost:
localhost:8080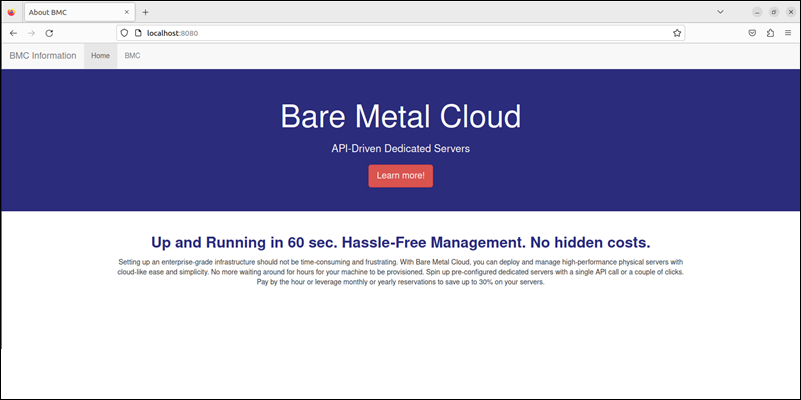
The link opens the landing page.
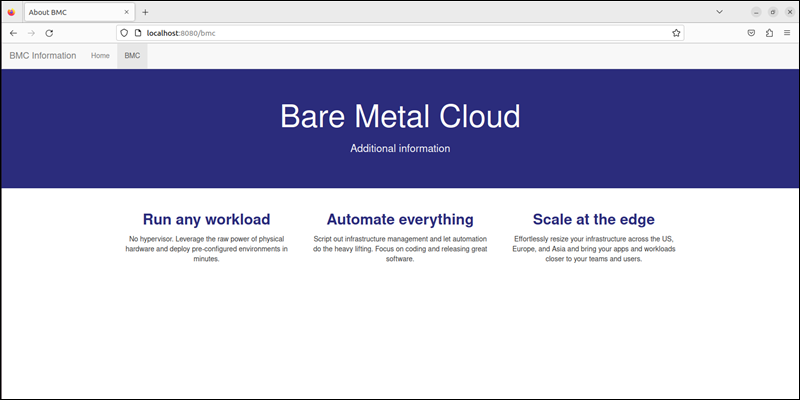
4. Click the button or second BMC page in the navigation bar to access the bmc.html page.
5. The terminal shows these requests. To quit the server, press CTRL+C in the terminal to terminate the session.
Step 4: Create Dockerfile
A Dockerfile is a script file that provides instructions on how to create a Docker image. Create a Dockerfile to specify which pages to include in the application container and define the project's dependencies.
Follow the steps below:
1. Create the Dockerfile:
nano Dockerfile2. Add the build steps to the file:
FROM node:10-alpine
RUN mkdir -p /home/node/app/node_modules && chown -R node:node /home/node/app
WORKDIR /home/node/app
COPY package*.json ./
USER node
RUN npm install
COPY --chown=node:node . .
EXPOSE 8080
CMD [ "node", "app.js" ]
Each line does the following:
FROM. Creates an official Docker image which is based on Alpine Linux. The distribution base image has a minimal size, which helps keep the Docker image size minimal.RUN. Creates directories for managing app permissions and changes the ownership of these directories to the node user. Leaving ownership to the root user is not recommended.WORKDIR. Sets the working directory for the app as /home/node/app.COPY. Copies the package.json file (and package-lock.json for npm 5 and greater). Docker's caching mechanism enables rebuilding only when the files update with new changes.USER. Switches to the node user.RUN. Runs thenpm installcommand.COPY. Changes the ownership of the code files to the node user.EXPOSE. Exposes port 8080 on the container.CMD. Runs thenode app.jscommand and starts the application.
3. Save the file and close nano.
4. Create an ignore file:
nano .dockerignoreThe ignore file specifies the files and directories that should not be added to the container.
5. Add the following list to the file:
npm-debug.log
node_modules
Dockerfile
.dockerignore
If using Git, add the .git directory and .gitignore files to the list.
Step 5: Build an Image and Run Container
The files are ready to build a Docker image from the Dockerfile and to create a container from the image. Run the Docker commands below to complete the process:
1. Build the image with the docker build command:
sudo docker build -t [dockerhub_username]/bmc-nodejs-demo-image .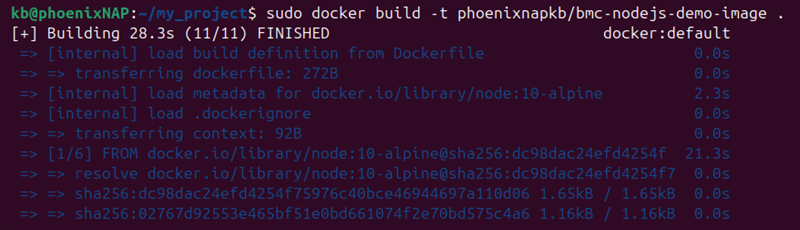
Add your Docker Hub username to the command.
2. Run the following command to see the built docker image:
sudo docker images
The output lists the created Docker image.
3. Create the container with the docker run command:
sudo docker run --name bmc-nodejs-demo-image -p :8080 -d <dockerhub username>/bmc-nodejs-demo-image
4. List the container details and fetch the address from the output:
sudo docker ps -a
The PORTS section from the output shows the server address and port.
5. Access the address through a browser to view the containerized image.
Step 6: Publish to Docker Hub
Publishing the image to a Docker Hub repository makes the project available for further development and subsequent use. To publish the project to the Docker Hub, do the following:
1. Log into your Docker Hub account with the following command:
sudo docker login -u [dockerhub_username]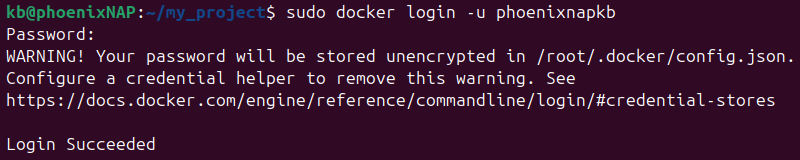
Enter the password when prompted to log in.
2. Push the image to the Docker Hub with:
sudo docker push [dockerhub_username]/bmc-nodejs-demo-image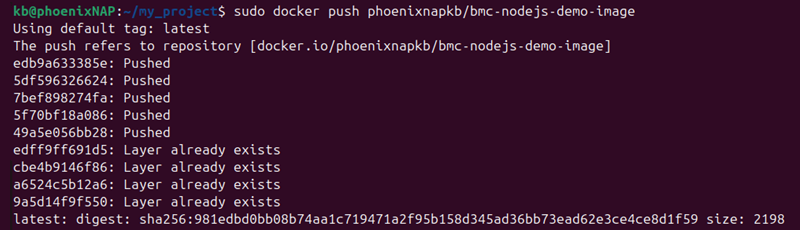
The image is now visible on your Docker Hub page and available for use.
3. To pull the image to a different machine, use:
sudo docker pull [dockerhub_username]/bmc-nodejs-demo-imageAlternatively, stop the docker container and remove the container and image from the current machine. Pull the image and use the same docker run command from step 5 to build the container.
Conclusion
After going through the steps in this guide, you should know how to build a Node.js app with Docker.
Next, read about Docker container best practices.