Introduction
Docker is a tool for creating, deploying, and running applications in containers. It is a popular software development tool as it speeds up the development process and does not use a lot of resources.
Docker containers are lightweight, especially compared to virtual machines. This feature is especially valuable for Raspberry Pi users.
This guide will show you how to install Docker on Raspberry Pi.
Prerequisites
- Raspberry Pi 3, 4, or newer with a running Raspberry Pi OS.
- Access to the terminal with sudo privileges.
- SSH connection enabled.
How to Install Docker on Raspberry Pi
To install Docker on your Raspberry Pi, go through the following steps:
- Update and upgrade your system.
- Install Docker components.
- Install Docker Engine and CLI.
- Allow a non-root user to execute Docker commands.
- Verify installation by running a "hello-world" container.
We will also show how to upgrade and uninstall Docker in the sections below.
Step 1: Update and Upgrade
Start by updating and upgrading the system. Open a terminal window and run the command:
sudo apt update && sudo apt upgrade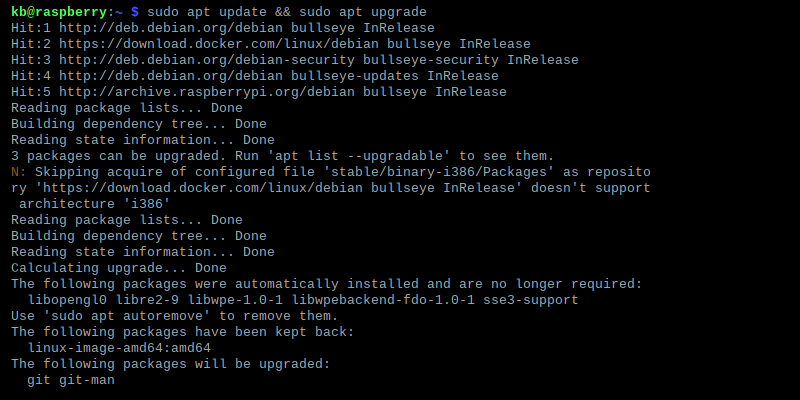
Note: To avoid security and performance issues, update Raspberry Pi frequently.
Step 2: Install Docker Components
Set up the necessary dependencies and configure the system to access Docker's repository. This approach ensures the latest stable Docker version and its components are available for installation. Follow these steps:
1. Install the required dependencies with the following apt command:
sudo apt install ca-certificates curl gnupg lsb-release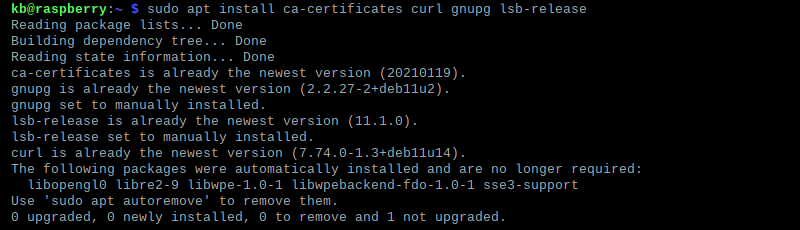
The command installs essential tools for setting up the Docker installation. curl helps download files, gnupg manages GPG keys, and lsb-release helps identify the Linux distribution.
2. Create a directory for storing GPG keys:
sudo mkdir -p /etc/apt/keyringsThe directory stores GPG keys. The -p flag helps create parent directories as well. If it already exists, the command does nothing.
3. Download and add Docker's official GPG key:
curl -fsSL https://download.docker.com/linux/debian/gpg | sudo gpg --dearmor -o /etc/apt/keyrings/docker.gpgThe command downloads and adds Docker's GPG key, which ensures the packages come from a trusted source.
4. Add Docker's APT repository with:
echo "deb [arch=$(dpkg --print-architecture) signed-by=/etc/apt/keyrings/docker.gpg] https://download.docker.com/linux/debian $(lsb_release -cs) stable" | sudo tee /etc/apt/sources.list.d/docker.list > /dev/nullThe command enables access to the latest Docker packages.
5. Update the package list:
sudo apt updateThe command refreshes the repository list and applies the changes.
Step 3: Install Docker Engine and CLI
The Docker engine and CLI are ready to install:
1. Install essential Docker packages with:
sudo apt install docker-ce docker-ce-cli containerd.io
The command installs:
- Docker Engine (
docker-ce). The core service that runs Docker containers. - Docker CLI (
docker-ce-cli). CLI tool for managing containers. - Containerd (
containerd.io). Docker's runtime engine for managing a container's lifecycle.
Note: For additional features, install other plugins. docker-buildx-plugin is required for multi-archirecture images, while docker-compose-plugin helps run multi-container applications.
Learn more about the differences between Docker images vs. containers.
2. Check the Docker version with:
docker --version
The command helps verify the installation worked.
Step 4: Add a Non-Root User to the Docker Group
By default, only users who have administrative privileges (root users or users with sudo) can run Docker commands. To avoid using sudo with every command, add the non-root user to the Docker group:
1. Add the user to the Docker group with:
sudo usermod -aG docker $USERThe usermod command adds the current user ($USER environment variable) to the docker group.
2. Verify the permissions with:
groups $USER
The command shows the current user's groups. The output shows docker, indicating the user is in the group.
3. Apply the changes immediately with:
newgrp dockerAlternatively, log out and log back in to apply the changes.
Step 5: Verify Docker Installation
To confirm Docker is running correctly, test the setup with a simple container. Run the "hello-world" container with the following docker run command:
docker run hello-world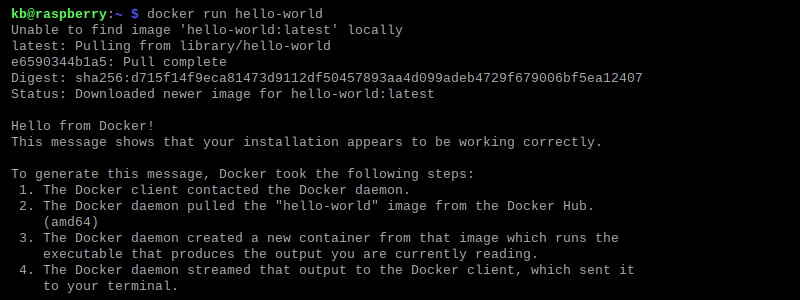
The command pulls the hello-world image from Docker Hub, creates a container, and runs a test message. If the output shows the message, the installation works.
Manage Docker on Raspberry Pi
Docker runs as a Linux service in the background. To manage the service, see the commands below:
1. Enable Docker to start on boot with:
sudo systemctl enable docker
Docker now automatically starts when the Raspberry Pi device boots up.
2. Start the Docker service with:
sudo systemctl start dockerThe command manually starts the Docker service.
3. Check the service's status with:
sudo systemctl status docker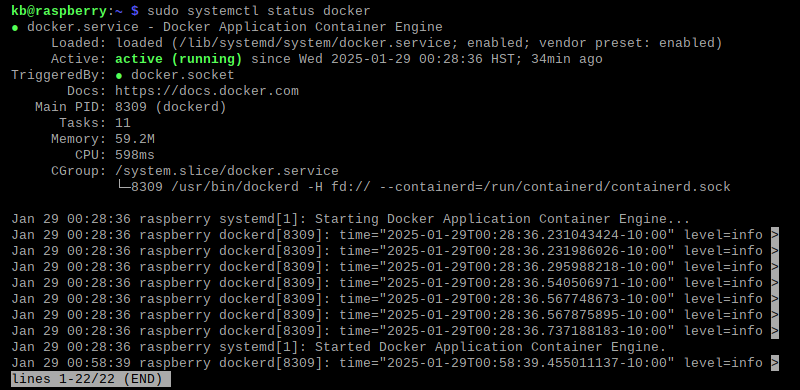
The command shows the current status, including recent logs.
In the following section, learn more about Docker images on Raspberry Pi, and how to upgrade or uninstall Docker on Raspberry Pi.
Note: See how to list, start, or stop Docker containers and get acquainted with some of the best practices for managing Docker containers.
Raspberry Pi Docker Images
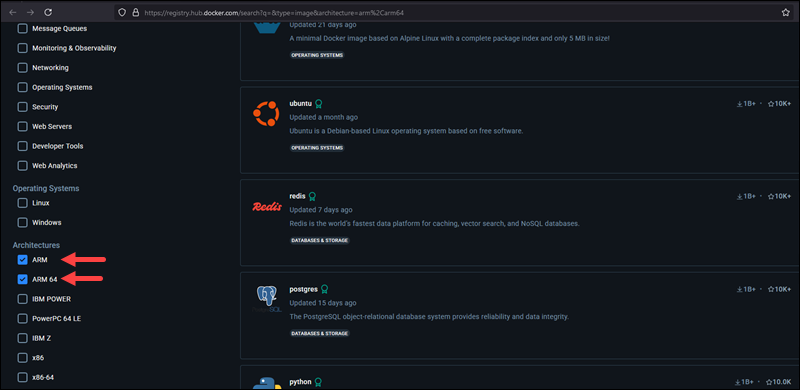
Raspberry Pi is based on ARM architecture. Due to this, not all Docker images work on a Raspberry Pi. Running Docker images designed for x64/x86 and i386 architecture on a Raspberry Pi returns an error.
When searching for images to pull from Docker Hub, apply the Architectures filter to search for supported apps.
For custom solutions, run a container based on an official image, modify it, and commit changes to the image.
How to Upgrade Docker on Raspberry Pi?
Upgrade Docker using the package manager:
sudo apt upgrade docker-ceThe command upgrades Docker Engine to the latest available version if available.
How to Uninstall Docker on Raspberry Pi?
To uninstall Docker on Rasberry Pi, do the following:
1. Use the apt purge command to uninstall the Docker-related packages:
sudo apt purge docker-ce docker-ce-cli containerd.io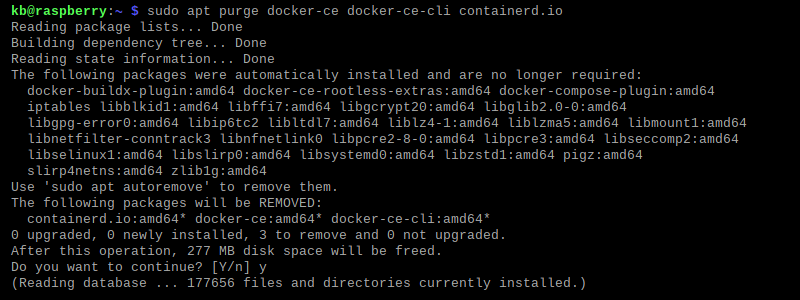
The command removes the essential Docker packages.
2. To delete leftover data, run the following command:
sudo rm -rf /var/lib/dockerThe command permanently deletes all Docker images, containers, and settings. Edited configuration files must be deleted manually.
Conclusion
This guide showed how to install and test Docker on Raspberry Pi. You are now set to use Docker on your Raspberry Pi and develop isolated and lightweight applications using containers.
Next, see how to deploy and run Redis in Docker.