Introduction
The LAMP stack is a set of open-source tools used for web application development. For a web application to work, it requires a web server, a server operating system, a database, and a programming language. Each software layer is necessary for creating a database-driven and dynamic website, and it is contained within the LAMP stack.
This step-by-step tutorial will show you how to install LAMP in Ubuntu and test your setup.
Prerequisites
- A system running Ubuntu.
- A user account with root privileges.
- Access to the terminal.
How to Install LAMP Stack on Ubuntu
LAMP is a collection of four components that make up a fully functional web development environment. The LAMP acronym contains the initials of the components' names:
- Linux - an operating system.
- Apache - an HTTP server.
- MySQL - a database management system.
- PHP - a programming language (Pearl and Python are also sometimes used in the stack).
Follow the steps below to install each tool on your system.
Step 1: Install Apache and Update Firewall Settings
Apache HTTP Server is the web server running on top of Linux in the LAMP stack. The web server uses HTTP to process requests and transmit information through the internet.
Follow the procedure below to install Apache.
1. Before installing the first LAMP component, ensure the package list on the system is up to date. Open the terminal and run:
sudo apt update2. Install the Apache package with the following command:
sudo apt install apache2 -yNote: The -y flag automatically accepts the installation confirmation prompt.
3. Check if Apache is installed correctly by checking the Apache service status:
sudo service apache2 statusThe service shows as running in the output:
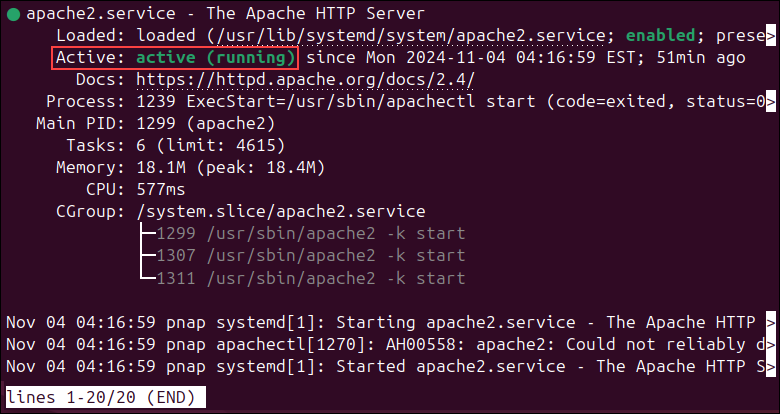
Exit the status screen by pressing Ctrl + C on the keyboard.
4. Next, make sure that the UFW firewall contains the Apache profiles by running the following command:
sudo ufw app list
5. Ensure the Apache Full profile allows the traffic on ports 80 and 443 with:
sudo ufw app info "Apache Full"The output should look similar to the following example:

6. Enter your server's IP address in the address bar of an internet browser to confirm that Apache is running, and press ENTER.
The test Apache web server page should display as below, stating that the server works:
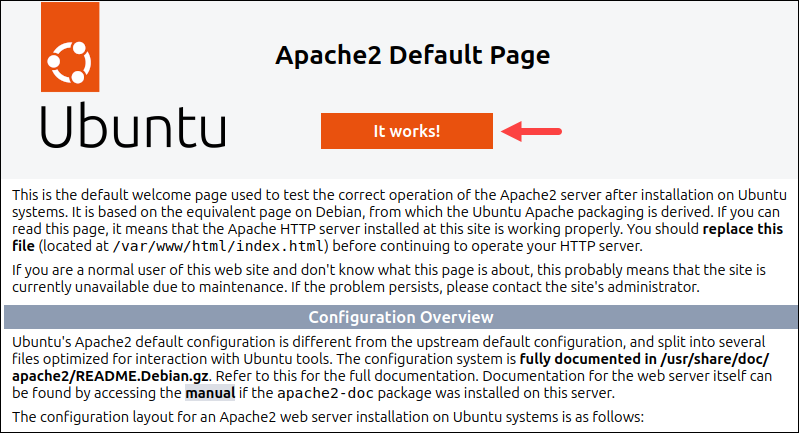
Note: You can access the Apache test page by typing localhost or 127.0.0.1 in the address bar.
Step 2: Install MySQL and Create a Database
MySQL is a relational database management system for creating and maintaining dynamic enterprise-level databases. It is compatible with all major OS platforms, which makes it a good fit for web application development.
Install MySQL with the following command:
sudo apt install mysql-server -yWait for the process to complete.
Note: Refer to our article to learn more about relational databases or see how to secure your MySQL installation after installation.
Step 3: Install PHP
Although other programming languages, such as Python and Pearl, also work well within LAMP, PHP is usually the final layer of the stack because it integrates well with MySQL. As a dynamic language, PHP integrates with HTML to enhance web application speed and simplify development.
Install PHP by following the steps below:
1. Obtain the necessary PHP packages with:
sudo apt install php libapache2-mod-php php-mysql -y2. To modify the way Apache serves files, open the dir.conf file in a text editor with root privileges:
sudo nano /etc/apache2/mods-enabled/dir.confThe configuration file looks like the example below:

By default, Apache first looks for an index.html file card. Edit the list so that the index.php file is in the first position. If necessary, add the first and last lines as well:
<IfModule mod_dir.c>
     DirectoryIndex index.php index.html index.cgi index.pl index.xhtml
</IfModule>
3. Press CTRL + X to save and close the file. Press y and ENTER to confirm.
Install PHP Modules (Optional)
If necessary, add more modules to improve PHP's functionality. Search, view, and install various libraries and modules using the procedure below:
1. Search for available PHP modules with:
apt-cache search php- | lessThe command pipes the results of the apt-cache search into less to simplify the output.
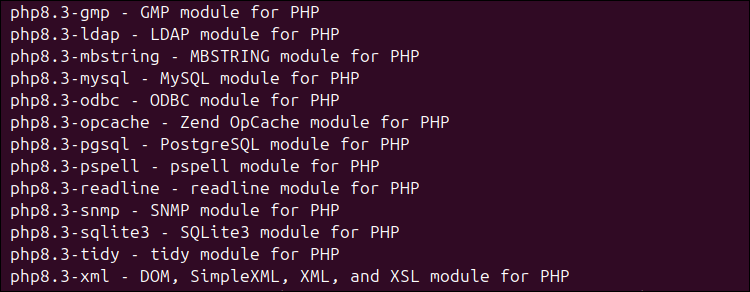
Scroll up and down with the arrow keys to see all the options, including a short description for each module. Quit the pager with q.
2. For example, to find out what the module php8.3-tidy does, run:
apt-cache show php8.3-tidyThe output displays the module description.
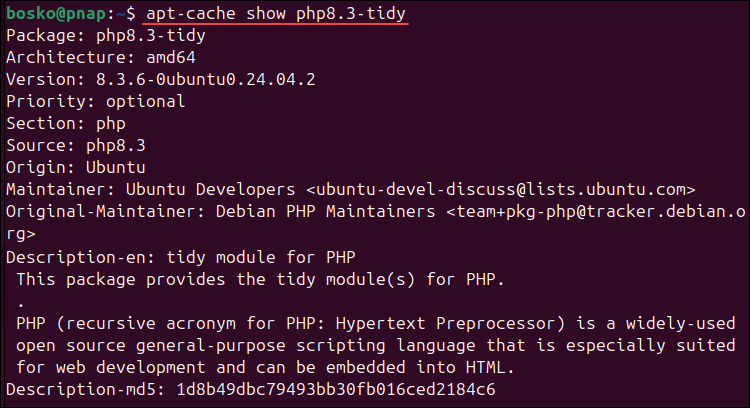
3. To install the php8.3-tidy package, run the following command:
sudo apt install php8.3-tidyStep 4: Restart Apache
Restart the Apache service for the changes to take effect:
sudo systemctl restart apache2If the command executes correctly, there is no output.
Step 5: Test PHP Processing on Web Server
To test the new LAMP installation, create a basic PHP script and place it in the /var/www/html/ directory. The script should then be accessible via an internet browser. The steps below explain the procedure for performing this test.
1. Create a file in the web root directory with the following command:
sudo nano /var/www/html/info.php2. Inside the file, paste the following PHP code:
<?php
phpinfo ();
?>
3. Press CTRL + X to save and close the file. Press y and ENTER to confirm.
4. Open an internet browser and type the following address:
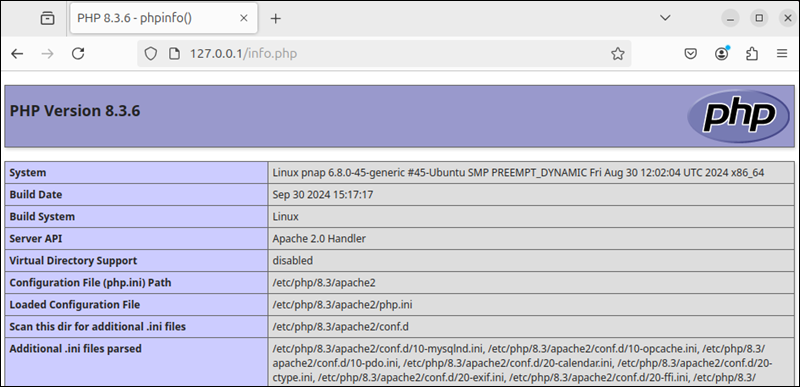
[server-ip-address]/info.phpSince we are working locally, we will type:
http://127.0.0.1/info.phpThe output should display the LAMP stack details, as seen in the image below:
Note: Hosting a web application on our Bare Metal Cloud platform allows you to eliminate the virtualization overhead and improve overall app performance.
Step 6: Test Database Connection
To verify that PHP can connect to MySQL, create a new PHP file with a simple database connection test. Follow the steps below:
1. In the web root directory, create the dbtest.php file:
sudo nano /var/www/html/dbtest.php2. Insert the following code, replacing username, password, and database_name with your MySQL details:
<?php
$conn = new mysqli("localhost", "username", "password", "database_name");

if ($conn->connect_error) {
    die("Connection failed: " . $conn->connect_error);
}
echo "Database connection successful!";
?>
3. Save and exit the file.
4. Open a browser and go to:
http://your_server_ip/dbtest.phpIf connected, you'll see "Database connection successful!" If not, check the credentials or MySQL status.

5. For security, delete dbtest.php with the rm command:
sudo rm /var/www/html/dbtest.phpStep 7: Set Up a Virtual Host (Optional)
To host multiple sites on your server or set up a custom domain, create a virtual host for each site. Follow the steps below:
1. Create a directory for your website and grant the current user ownership of the entire directory and its contents:
sudo mkdir -p /var/www/yourdomain.com/html
sudo chown -R $USER:$USER /var/www/yourdomain.com/html
2. Create a configuration file in Apache's sites-available directory to configure the virtual host:
sudo nano /etc/apache2/sites-available/[yourdomain.com].confReplace [yourdomain.com] with your website's domain.
3. Paste the following lines in the file:
<VirtualHost *:80>
    ServerAdmin [email protected]
    ServerName yourdomain.com
    ServerAlias www.yourdomain.com
    DocumentRoot /var/www/yourdomain.com/html
    ErrorLog ${APACHE_LOG_DIR}/error.log
    CustomLog ${APACHE_LOG_DIR}/access.log combined
</VirtualHost>
Replace [email protected], yourdomain.com, www.yourdomain.com, and /var/www/yourdomain.com/html with your site details.
4. Enable the new virtual host with:
sudo a2ensite yourdomain.com.conf5. Restart the Apache service for the changes to take effect:
sudo systemctl reload apache2Apache now serves requests for yourdomain.com from /var/www/yourdomain.com/html.
Conclusion
This guide showed how to install each software layer required to build the LAMP stack on Ubuntu. With LAMP, you have everything necessary to start web application development.
Next, see how LAMP compares to MEAN or learn to fix the localhost refused to connect error.
