Introduction
Jenkins is a CI/CD software platform that supports continuous integration (CI) and continuous delivery (CD). It is used to automate software testing, building, delivery, and deployment.
Using Jenkins on Ubuntu creates a powerful management tool that takes a development workflow to the next level.
This guide will help you install Jenkins on a Ubuntu system.

Prerequisites
- A system running Ubuntu.
- A user account with root privileges.
- Access to a terminal window.
- Java installed.
Step 1: Install Java
Jenkins requires the Java Runtime Environment (JRE). This guide uses OpenJDK for the Java environment. OpenJDK is a Development Kit, and includes the Java Runtime Environment.
At the time of writing this article, Jenkins only supports Java 8 and Java 11 on Ubuntu. You can have multiple versions of Java installed on Ubuntu. If you do, make sure Java 8 or Java 11 is set as the default version.
Follow the steps below to install Java on Ubuntu:
1. Check if you already have Java installed on your Ubuntu system:
java -version
If the output states "command 'java' not found", then Java is not installed on the system and you can proceed with the steps below to install it. Otherwise, skip ahead to Step 2.
2. Open a terminal window and update the system package repository index:
sudo apt updateWait for the update to complete. Updating the index refreshes it with the latest program versions available.
3. Install Java with the following command:
sudo apt install openjdk-21-jdk -yWait for the process to complete.
4. Recheck the Java version to verify the installation:
java -version
Step 2: Add Jenkins Repository
It is recommended to install Jenkins using the project-maintained repository, rather than from the default Ubuntu repository. The reason for that is the Jenkins version in the default Ubuntu repository might not be the latest available version. This means it could lack the latest features and bug fixes.
Follow the steps below to add the Jenkins repository to your Ubuntu system.
1. Start by importing the GPG key. The GPG key verifies package integrity. Run the command below:
sudo wget -O /usr/share/keyrings/jenkins-keyring.asc https://pkg.jenkins.io/debian-stable/jenkins.io-2023.key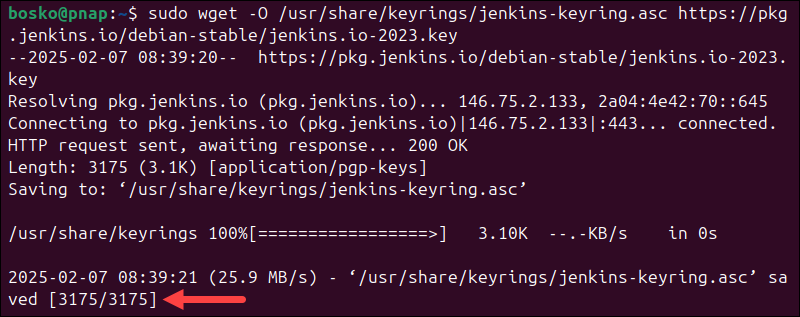
Wait for the command to download and save the key.
2. Add the Jenkins software repository to the source list and provide the authentication key:
echo "deb [signed-by=/usr/share/keyrings/jenkins-keyring.asc]" https://pkg.jenkins.io/debian-stable binary/ | sudo tee \
/etc/apt/sources.list.d/jenkins.list > /dev/null
The command adds the Long Term Support (LTS) stable release to the sources list.
Step 3: Install Jenkins
After setting up the prerequisites, follow the steps below to install Jenkins on Ubuntu:
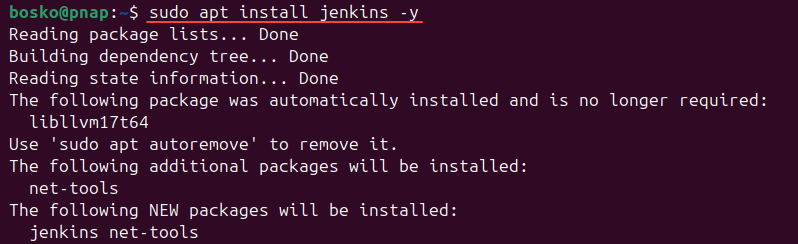
1. Update the system repository one more time. Updating refreshes the cache and makes the system aware of the new Jenkins repository.
sudo apt update2. Install Jenkins by running:
sudo apt install jenkins -yWait for the download and installation to complete.
3. To check if Jenkins is installed and running, run the following command:
sudo systemctl status jenkinsA bright green entry labeled active (running) should appear in the output, indicating that the service is running:
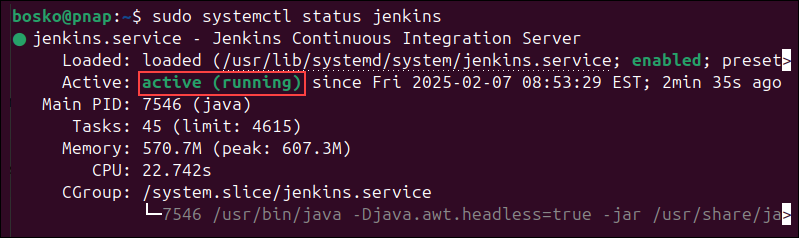
4. Exit the status screen by pressing Ctrl+C.
Note: To make the Jenkins service start automatically on boot, enter sudo systemctl enable jenkins
Step 4: Modify Firewall to Allow Jenkins
Allow Jenkins to communicate by setting up the default UFW firewall:
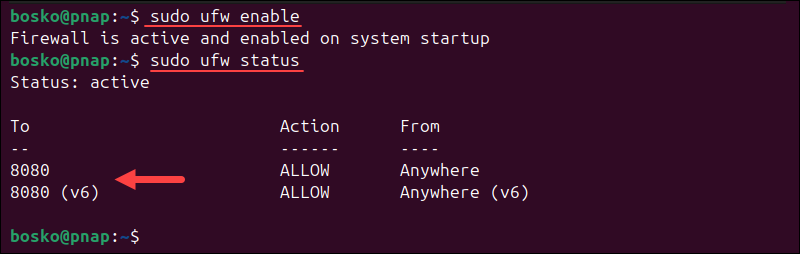
1. Open port 8080 by running the following commands:
sudo ufw allow 8080
If you use a different firewall application, follow its instructions to allow traffic on port 8080.
2. To ensure the rules have been applied correctly, check the firewall status with:
sudo ufw statusIf you have not configured the UFW firewall yet, it displays as inactive:

3. Enable UFW by running:
sudo ufw enable4. After enabling the firewall, check its status again to ensure everything is set up correctly:
Note: If you need to change the Jenkins port, check out our article how to change port for Jenkins.
Step 5: Set Up Jenkins
Follow the steps below to set up Jenkins and start using it:
1. Open a web browser and navigate to your server's IP address. Use the following syntax:
http://ip_address_or_domain:8080Use the actual IP address or domain name for the server on which you are using Jenkins. For example, if you run Jenkins locally, enter localhost (127.0.0.1):
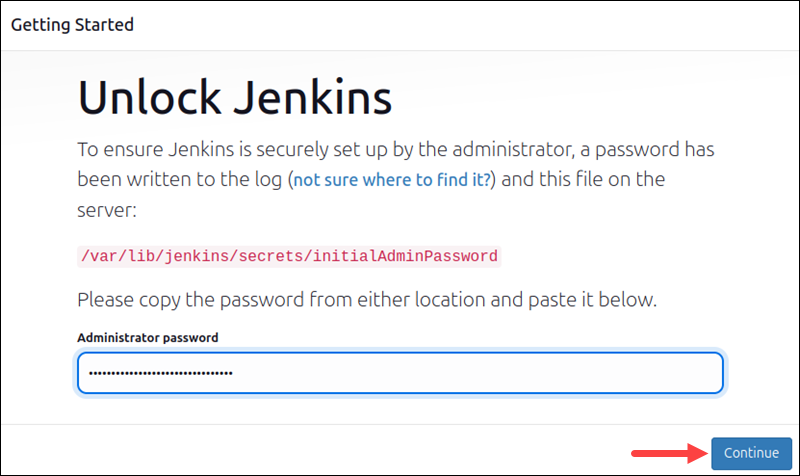
http://localhost:8080A page opens and prompts you to Unlock Jenkins. Keep the page open and obtain the required administrator password in the next step.
2. Open the terminal and run the following command to get the default Jenkins unlock password:
sudo cat /var/lib/jenkins/secrets/initialAdminPassword
The system returns an alphanumeric code. Select the code and copy it.
3. Paste the code in the Administrator password field in the Jenkins unlock page and click Continue.
4. The setup prompts to either Install suggested plugins or Select plugins to install. It’s fine to install the suggested plugins.
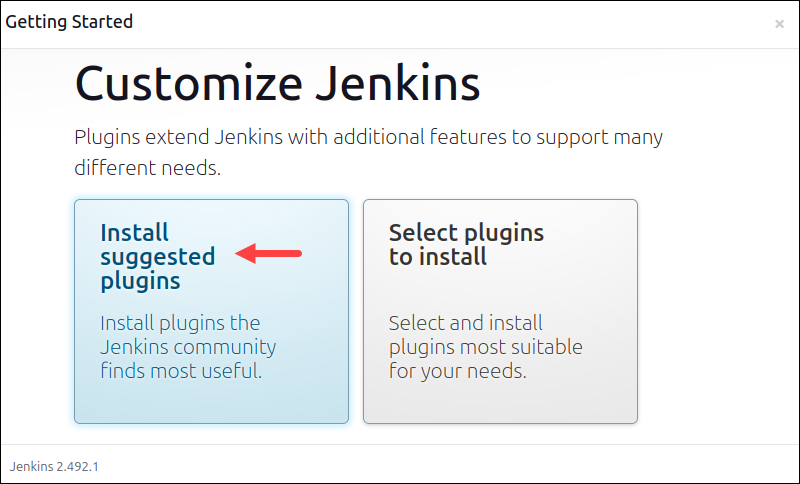
You can always install more plugins later. The system continues the initial Jenkins setup.
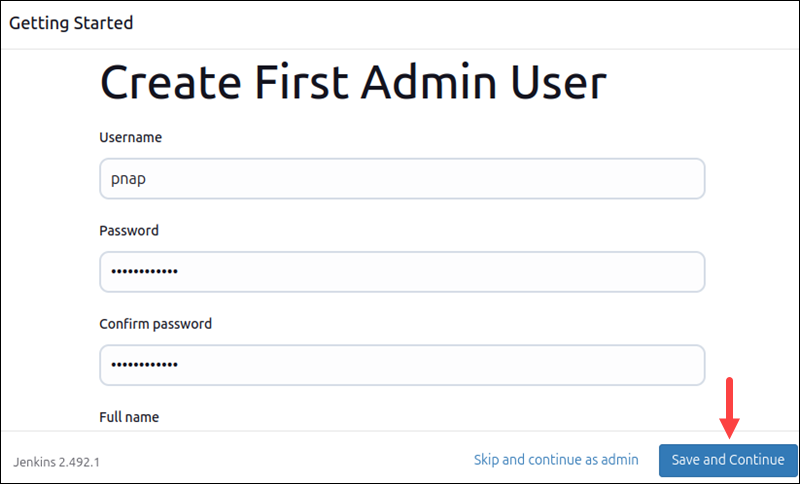
5. In the Create First Admin User step, enter the credentials you want to use for your Jenkins administrator. Then, click Save and Continue.
6. Next, set up the Instance Configuration. This is the preferred network address for this Jenkins installation. Confirm the address you want to use for your server. This is most likely the same address you used to get to this configuration page.
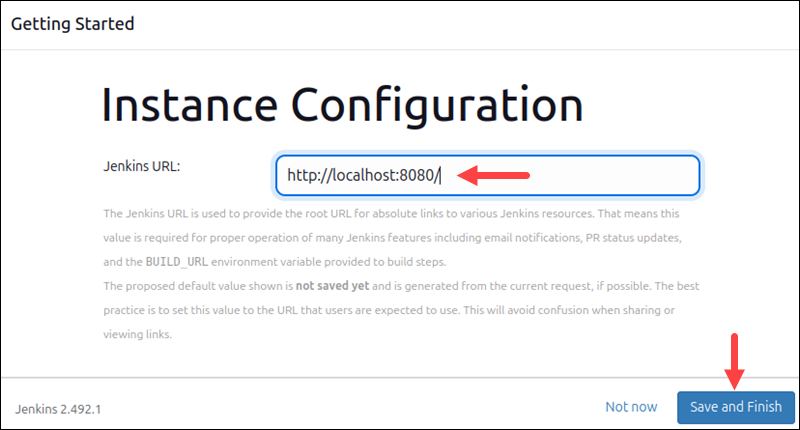
Once you specify the Jenkins URL, click Save and Finish.
Step 6: Test Jenkins Installation
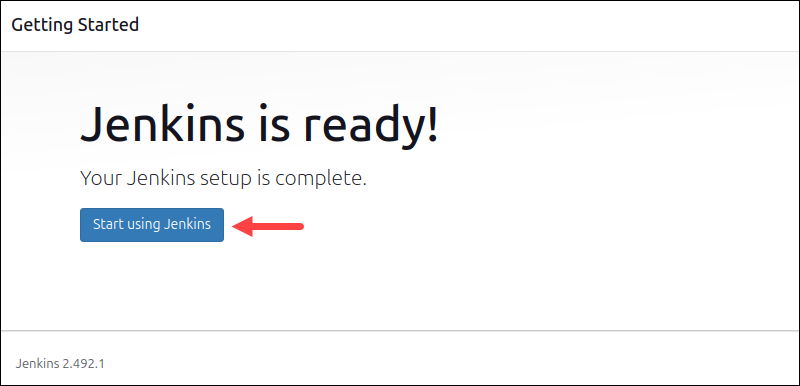
After you complete the instance configuration step, you should see a page that says Jenkins is ready! Click Start using Jenkins to complete the configuration.
Note: Check out our guide on how to restart Jenkins manually - a useful practice while troubleshooting issues.
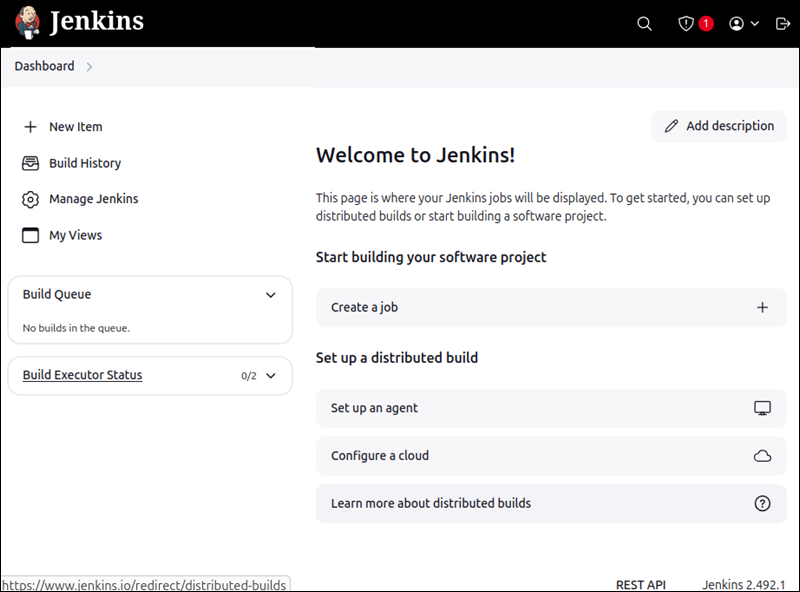
The Jenkins dashboard opens, where you can create and manage jobs, set up pipelines, and integrate with version control systems:
Conclusion
By following the steps in this guide, you should now have a working installation of Jenkins on your Ubuntu system.
Next, discover how to set up Jenkins on a Kubernetes cluster. If you are using a different Linux distribution, follow our guide on how to install Jenkins on Debian 10, and how to install Jenkins on CentOS and Rocky Linux.