Introduction
Nvidia graphics processing units (GPUs) have exceptional parallel computing potential, much higher than CPUs. That is why GPUs are becoming the main choice for high-performance workloads.
Aside from gaming, Nvidia GPUs are also used for 3D rendering, mining, visualization, machine learning, AI, and in data centers. However, only proprietary drivers will allow you to utilize the GPU's potential fully.
In this tutorial, you will learn how to install the latest Nvidia drivers on Ubuntu.
Prerequisites
- A machine running Ubuntu.
- A user account with root privileges.
- An Nvidia GPU.
Note: Learn why and how GPUs are used for machine learning and AI in our article on GPU Machine Learning.
Install Nvidia Driver Using GUI
Ubuntu comes with open-source Nouveau drivers for Nvidia GPUs out of the box. The Nouveau driver does not harness the GPU's full power and sometimes performs worse or causes system instability. Nvidia's proprietary drivers are much more reliable and stable.
The first way to install Nvidia drivers is to use the GUI Software & Updates app. The GUI approach is suitable for beginners as it utilizes a graphical interface to detect available drivers automatically and suggest the recommended version.
Important: When you decide which installation method to use, stick to that one and do not use them interchangeably as you can cause system instability. Additionally, this guide will only work for official kernel versions. If you are using a custom-built Linux kernel, the installation may not be successful as it heavily relies on the official Linux kernel versions.
Follow the steps below:
Step 1: Open Software and Updates
The Software and Updates app in Ubuntu is a tool that allows users to manage software sources, install updates, configure drivers, and adjust download settings for packages and security updates.
1. Click the Show Applications button and type "software and updates" in the search bar.
2. Select the Software and Updates app from the results.
Step 2: Choose Driver
Next, choose the proprietary driver from the list of available drivers. Follow the steps below:
1. Click the Additional Drivers tab and wait for the app to download a list of additional drivers available for your GPU.
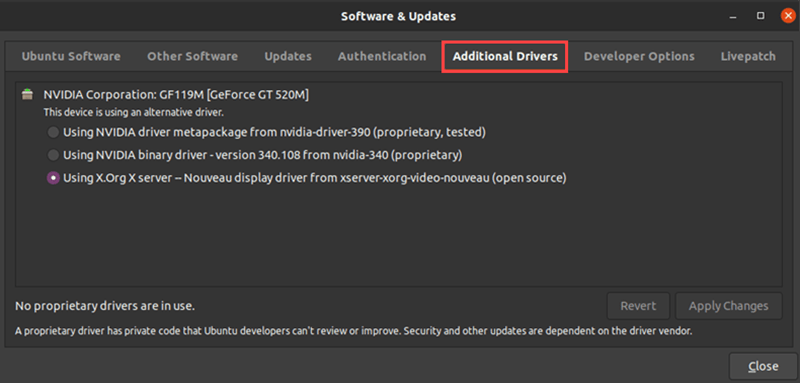
The driver installed on your machine is selected by default. It is usually an open-source Nouveau display driver.
2. From the list, select the latest Nvidia driver labeled proprietary, tested and click Apply Changes. This is the latest stable driver Nvidia published for your GPU.
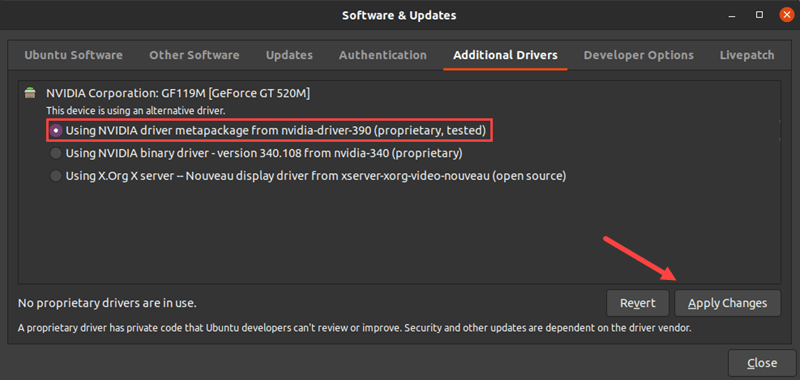
3. Enter your administrator password and wait for the installation to finish.
Step 3: Restart
Restart the machine so the changes take effect. After the reboot, you should have the latest proprietary Nvidia drivers for your GPU.
Install Nvidia Driver via Command Line
The second way to install Nvidia drivers is to use the terminal. The terminal approach gives you more control over the installation process, as you can specify exact driver versions.
Follow the steps below:
Step 1: Update the System Package Repository
Before installing the driver, update the package repository on your system to ensure you get the latest drivers. Run the following command:
sudo apt updateWait for the process to complete.
Step 2: Search for Nvidia Drivers
Nvidia drivers are available in the official Ubuntu repositories, which can be accessed via apt:
1. Open the terminal with Ctrl+Alt+T.
2. Run the following command to search for available drivers:
apt search nvidia-driver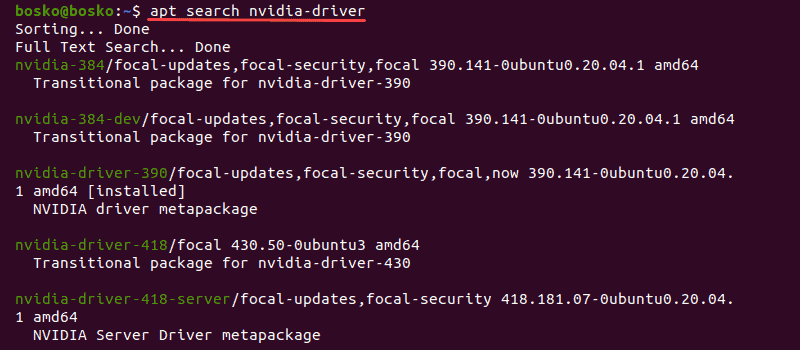
The output shows a list of available drivers for your GPU. Scroll through the list and take note of the driver you want to install. The best fit is the latest tested proprietary version.
Step 3: Install the GPU Driver
After choosing a driver to install from the list of available GPU drivers, it is time to install it.
The syntax for installing the driver is:
sudo apt install [driver_name]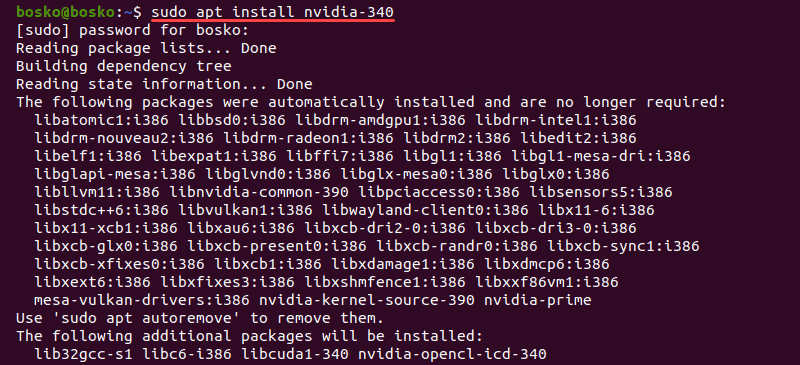
For this tutorial, we installed nvidia-340, the latest tested proprietary driver for this GPU.
Step 4: Reboot
Reboot your machine with the following command:
sudo rebootInstall Nvidia Beta Drivers via PPA Repository
The PPA repository allows developers to distribute software that is unavailable in the official Ubuntu repositories. This means that you can install the latest beta drivers, however, at the risk of an unstable system. This method targets advanced users who prioritize the latest features over stability.
To install the latest Nvidia drivers via the PPA repository, follow these steps:
Step 1: Add PPA to the System
Add the graphics drivers repository to the system with the following command:
sudo add-apt-repository ppa:graphics-drivers/ppa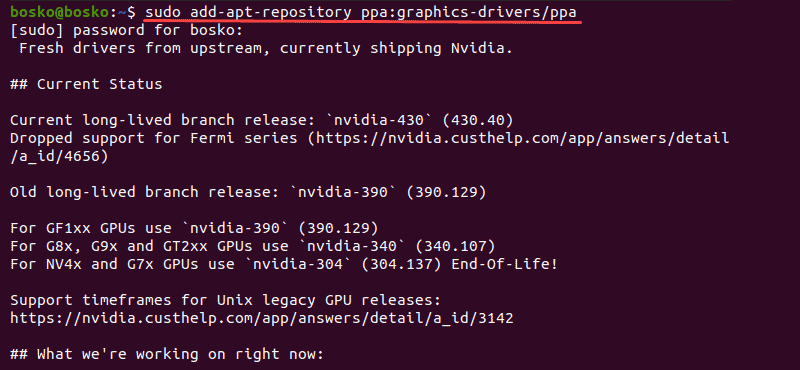
Enter your password when prompted and hit Enter to add the repository.
Step 2: Identify GPU Model and Available Drivers
To verify which GPU model you are using and to see a list of available drivers, run the following command:
ubuntu-drivers devices
The output shows your GPU model and any available drivers for that specific GPU.
Step 3: Install Nvidia Driver
There are two ways to install the Nvidia drivers, depending on whether you want to install a specific driver or to automatically install the recommended version.
Install a Specific Driver
To install a specific driver, use the following syntax:
sudo apt install [driver_name]
For example, we installed the nvidia-340 driver version.
Install Recommended Driver
Alternatively, install the recommended driver automatically by running:
sudo ubuntu-drivers autoinstall
In this example, no changes were made as the recommended driver has already been installed.
Step 4: Restart the System
Reboot the machine for the changes to take effect. Enter this command:
sudo rebootHow to Uninstall Nvidia Driver
If you want to uninstall the proprietary Nvidia driver, the best option is to use the remove --purge command. The command completely uninstalls a package from the system, deleting the package files and associated configuration files.
Follow the steps below:
Step 1: See Installed Packages
If you plan to remove specific Nvidia packages, this step helps identify the exact package names to avoid removing other unrelated software by accident.
Run the following command to check which Nvidia packages are installed on the system:
dpkg -l | grep -i nvidia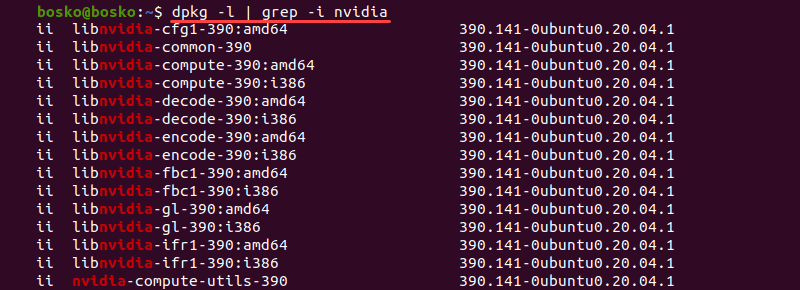
The output returns a list of all Nvidia packages on the system.
Note: Check out how to list installed packages on Ubuntu.
Step 2: Purge Nvidia Packages
After listing the packages, remove them using the command below:
sudo apt remove --purge '^nvidia-.*'You can also list only specific packages instead of '^nvidia-.*' to remove them.
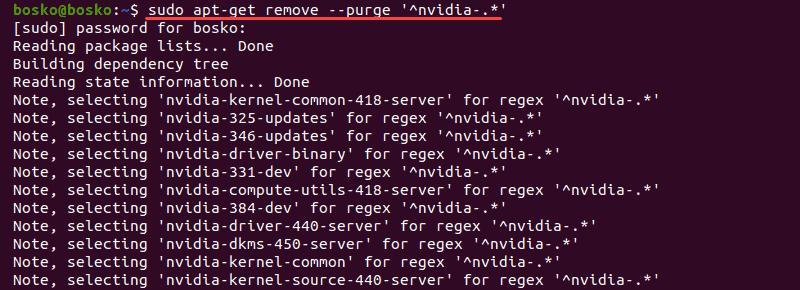
The command purges every Nvidia package from the system. The ubuntu-desktop package could also be purged because it is a dependency of the nvidia-common package. It is a meta-package that installs the default Ubuntu desktop environment and all essential components for a complete Ubuntu graphical desktop experience.
If the ubuntu-desktop package is removed, reinstall it with the following command:
sudo apt install ubuntu-desktopStep 3: Reboot the System
Reboot your system with sudo reboot. By default, the system loads the open-source Nouveau driver during boot.
Conclusion
This guide showed how to install proprietary Nvidia drivers on your system using the GUI app, the official Ubuntu repository, or the PPA repository if you want the beta versions. You also know how to uninstall Nvidia drivers if you want to go back to using the open-source Nouveau driver.
Next, check out how to install NVIDIA Tesla drivers on Linux or Windows or install Nvidia drivers on Debian or Fedora.


