Introduction
Checking out in Git updates the files in the working tree to match the version in the index or in the specified tree. It is often used to switch between branches, to operate files, directories, and commits, or to restore files in the working tree.
Developers check out a file from another branch when a branch is not ready for merging, but they need one or multiple files from the branch to implement in their work.
In this tutorial, you will learn to check out a file from another branch in Git using git checkout, git restore, and git show.
Prerequisites
- Git installed (see how to install Git on Ubuntu, macOS, Windows, CentOS 7, or CentOS 8).
- A Git repository.
How to Checkout a File from Another Branch in Git?
To check out a Git file from another branch, use one of the methods below:
git checkout. The simplest way to check out a file.git restore. Restores the specified file from the restore source.git show. Redirects a file's contents to the specified path.
You can also use the commands to check out an entire directory or multiple files from a separate branch. The sections below explain how to use the commands and showcase useful examples.
Note: Read our tutorial and learn how to checkout a submodule in Git. A Git submodule allows independent repositories to exist as subdirectories within a project repository.
Method 1: Use the git checkout Command
The git checkout command is the simplest way to get a file or directory from a separate Git branch. Follow the steps below:
1. Switch to the branch where you want to copy the file. Use git checkout or git switch:
git switch [branch_name]For example:

The command switches the branch to main.
2. Use the following syntax to check out the file from a separate branch:
git checkout [branch_name] -- [file_path]In a sub-directory, you can also use ./ instead of the full file path.
Note: The checkout command also allows you to checkout a directory from another branch by specifying its path, or multiple files by specifying each one. It is also possible to checkout a file or directory from the stash.
For example:

The command copies the specified file to the main branch, which we are currently on. Note that only the latest state of the file is copied, and it doesn't carry over any file history from the source branch.
3. Use git status to check if the file has been copied:
git status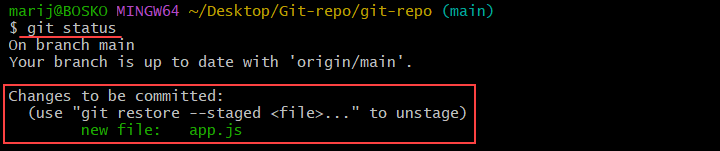
The output shows that the file has been copied to the target branch and is waiting to be committed.
4. Create a new commit to implement the changes in your branch. Use the following syntax:
git commit -m "[message]"For example:

Note: See how to revert a commit in Git.
5. Optionally, push the changes to a remote repository for other developers to see and use.
git push [remote_name]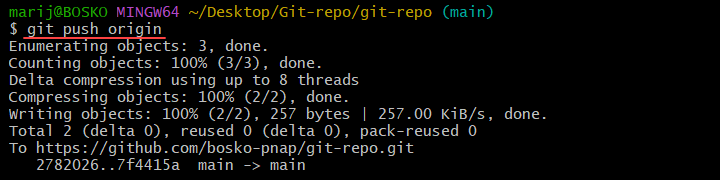
In the example above, we pushed the changes to the default repository named origin.
Method 2: Use the git restore Command
Another way to check out a file in Git is to use the git restore command. The command restores a specified path in the working tree with contents from the restore source.
Follow the steps below to check out a file using git restore:
1. Switch to the target branch:
git switch [branch_name]2. Use the following syntax to check out a file from another branch:
git restore --source [branch_name] [file_path]For example:

By default, the command restores only the working tree. To update the index as well, add the -SW flags:
git restore --source [branch_name] -SW [file_path]3. Add the file to the tracking index if you didn't specify the -SW flags in the previous step:
git add .4. Commit the changes:
git commit -m "[message]"
4. Push the changes to a remote repository:
git push [remote_name]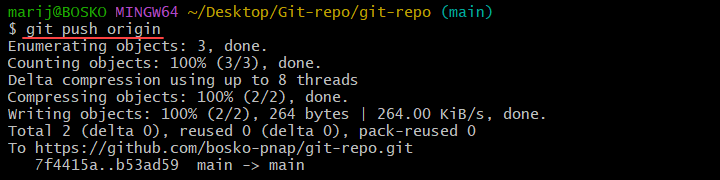
Method 3: Use the git show Command
The git show command is a Git tool used to show details of Git objects, such as blobs, trees, tags, and commits. It can also be used to check out a file from another branch by redirecting its output into a new file.
Follow the steps below to check out a file using git show:
1. Make sure your HEAD is pointing to the target branch. Use git checkout or git switch to switch to the branch where you want the file copied:
git checkout [branch_name]2. Check out the file from the other branch using the following syntax:
git show [source_branch]:[file_path] > [full_file_path]The command redirects the specified file from the source branch to the specified directory path. Make sure to use the full path from the root directory of the repository. If the current working directory is relative, then just use the file name.
For example:

3. Add the file to the tracking index:
git add .4. Commit the changes:
git commit -m "[message]"
5. Push the changes to a remote repository to make them available to other developers:
git push [remote_name]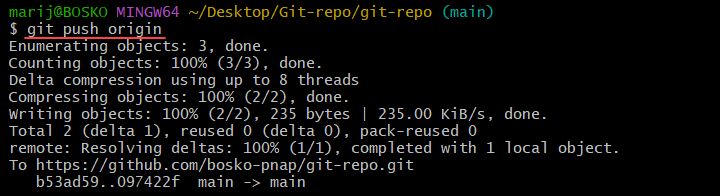
Conclusion
This tutorial showed how to check out a file in Git from another branch using three different methods. Use the method that suits you best and copy a file, multiple files, or an entire directory without having to merge branches.
For more Git tutorials, read our Git beginner's guide, or download our Git commands cheat sheet to help you version control projects with Git.
