Introduction
High-traffic web servers benefit from implementing load balancers. A load balancer helps relay traffic across multiple web servers, ensuring high availability and maintaining web server performance during traffic spikes.
HAProxy is a popular, reliable, and cost-efficient solution for load balancing. The software is known for being robust and dependable. Many popular websites, such as GitHub, Reddit, Slack, and Twitter, use HAProxy for load-balancing needs.
This tutorial explains how to set up and use HAProxy for load balancing.

Prerequisites
- A system with Linux OS.
- Access to the sudo command.
- Python 3 installed.
What is HAProxy?
HAProxy (Highly Available Proxy) is an efficient web load balancer and reverse proxy server software written in C. This open-source software is available for most Linux distributions in popular package managers.
The tool has many complex functionalities, including a complete set of load balancing features.
As a load balancer, HAProxy works in two modes:
- A TCP connection load balancer, where balancing decisions occur based on the complete connection.
- An HTTP request balancer, where balancing decisions occur per request.
The sections below demonstrate how to create a HTTP load balancer.
Setting up HAProxy for Load Balancing
Install HAProxy on your system before setting up the load balancer. HAProxy is available in the yum and APT package manager repositories.
To install HAProxy, follow the directions for your OS below:
- For Ubuntu and Debian-based systems using the APT package manager, do the following:
1. Update the package list:
sudo apt update2. Install HAProxy with the following command:
sudo apt install haproxy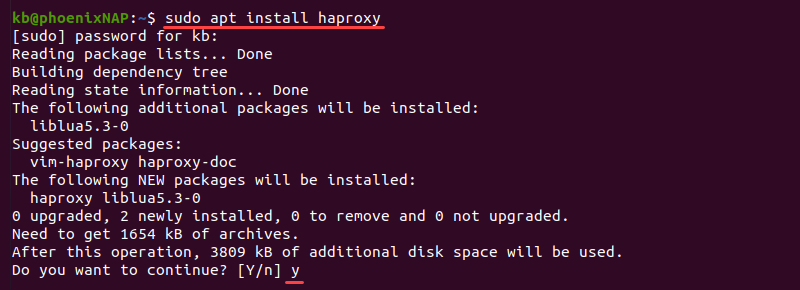
Press y and Enter to continue when prompted and wait for the installation to complete.
- For CentOS and RHEL-based systems using the yum package manager, to install HAProxy:
1. Update the yum repository list:
sudo yum update2. Install HAProxy with the following command:
sudo yum install haproxyWait for the installation to complete before starting the setup.
Setting Initial Configuration
HAProxy provides a sample configuration file located in /etc/haproxy/haproxy.cfg. The file contains a standard setup without any load balancing options.
Use a text editor to view the configuration file and inspect the contents:
sudo nano /etc/haproxy/haproxy.cfgThe file has two main sections:
- The
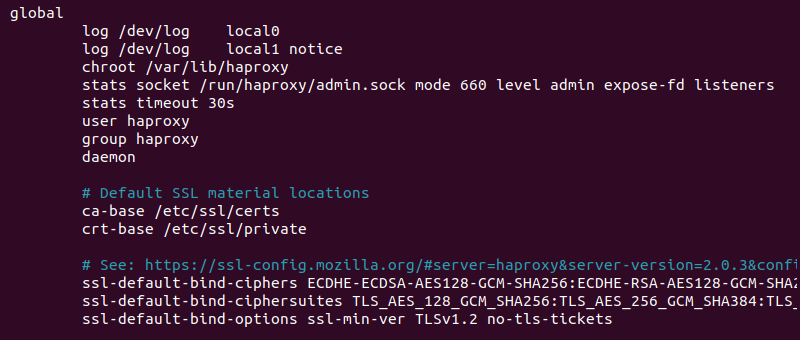
globalsection. Contains configuration for HAProxy, such as SSL locations, logging information, and the user and group that execute HAProxy functions. There is only oneglobalin a configuration file, and the values should not be altered.
- The
defaultssection. Sets the default values for all nodes defined below it. Multipledefaultssections are possible, and they override previous default values.

Additional sections for load balancing include:
- The
frontendsection. Contains information about the IP addresses and ports clients use to connect. - The
backendsection. Defines server pools that fulfill requests sent through the frontend. - The
listensection. Combines the functions of thefrontendandbackend. Uselistenfor smaller setups or when routing to a specific server group.
A typical load balancer configuration file looks like the following:
global
    # process settings
defaults
    # default values for sections below
frontend
    # server the clients connect to
backend
    # servers for fulfilling client requests
listen
    # complete proxy definition
Below is a detailed explanation of the sections and an example setup for a load balancing server with a custom configuration file. Clear all the contents from the default file and follow the example below.
Setting Defaults
The defaults section contains information shared across nodes defined below this section. Use defaults to define the operational mode and timeouts. For example:
defaults
    mode http
    timeout client 5s
    timeout connect 5s
    timeout server 5s
    timeout http-request 5s
The code consists of:
- The
modesection. A directive that defines the operating mode for the load balancer, set to eitherhttportcp. The mode tells HAProxy how to handle incoming requests. - The
timeoutsection. Consists of various safety measures for avoiding standard connection and data transfer problems. Increase or decrease the times according to your use case.timeout clientis the time HAProxy waits for the client to send data.timeout connectis the time needed to establish a connection with the backend.timeout serveris the wait time for the server to send data.timeout http-requestis the wait time for the client to send a complete HTTP request.
Copy and paste the defaults code block into the /etc/haproxy/haproxy.cfg file and continue to the next section.
Setting Frontend
The frontend section exposes a website or application to the internet. The node accepts incoming connection requests and forwards them to a pool of servers in the backend.
Append the last two lines to the /etc/haproxy/haproxy.cfg file:
defaults
    mode http
    timeout client 10s
    timeout connect 5s
    timeout server 10s
    timeout http-request 10s

frontend my_frontend
    bind 127.0.0.1:80
The new lines consist of the following information:
frontenddefines the section start and sets a descriptive name (my_frontend).bindbinds a listener to the localhost127.0.0.1address on port80, which is the address where the load balancer receives requests.
Save the file and restart the HAProxy service. Run:
sudo systemctl restart haproxyThe connection listens for requests on 127.0.0.1:80. To test, send a request using the curl command:
curl 127.0.0.1:80
The response returns a 503 error, meaning there is no reply from the server. The response makes sense because the backend servers currently do not exist. The following step sets up the backend node.
Setting Backend
The backend is a pool of servers for fulfilling and resolving client requests. The section defines how the load balancer distributes the workload across multiple servers.
Append the backend information to the /etc/haproxy/haproxy.cfg file:
defaults
    mode http
    timeout client 10s
    timeout connect 5s
    timeout server 10s
    timeout http-request 10s

frontend my_frontend
    bind 127.0.0.1:80
    default_backend my_backend

backend my_backend
    balance leastconn
    server server1 127.0.0.1:8001
    server server2 127.0.0.1:8002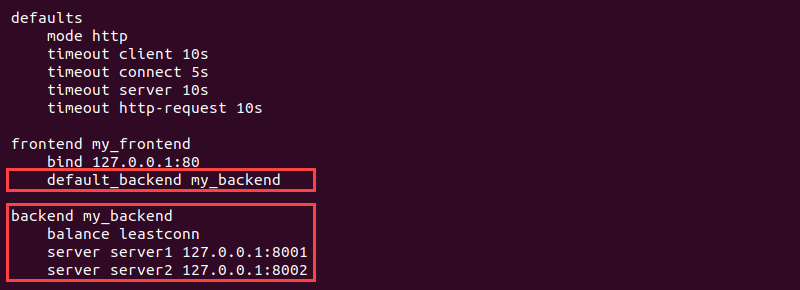
Each line has the following information:
default_backendin thefrontendsection establishes communication between the front and back.backendcontains a descriptive name (my_backend) for the server pool, which we use to connect with the frontend.balanceis the load balancing algorithm. If omitted, the algorithm defaults to round-robin.serverdefines a new server on each line with a unique name, IP address, and port.
To test, do the following:
1. Save the file and restart the HAProxy service:
sudo systemctl restart haproxy2. Bind the backend ports to the address using Python to create web servers. Run the commands in two different terminal tabs:
python3 -m http.server 8001 --bind 127.0.0.1python3 -m http.server 8002 --bind 127.0.0.1
3. In a third terminal window, send a request to confirm the connection works:
curl 127.0.0.1
The server processes the request from the client and sends a response back. The output displays the contents of the directory where the server is running.
Check the terminal window of the running server to see the request.

The output shows the GET request with a response 200.
Setting Rules
Additional rules help configure the load balancer to handle cases with exceptions. For example, if there are multiple backends to which we direct client requests, the rules help define when to use which backend.
An example setup looks like the following:
defaults
    mode http
    timeout client 10s
    timeout connect 5s
    timeout server 10s
    timeout http-request 10s

frontend my_frontend
    bind 127.0.0.1:81, 127.0.0.1:82, 127.0.0.1:83
    use_backend first if { dst_port = 81 }
    use_backend second if { dst_port = 82 }
    default_backend third

backend first
    server server1 127.0.0.1:8001

backend second
    server server2 127.0.0.1:8002

backend third
    server server3 127.0.0.1:8003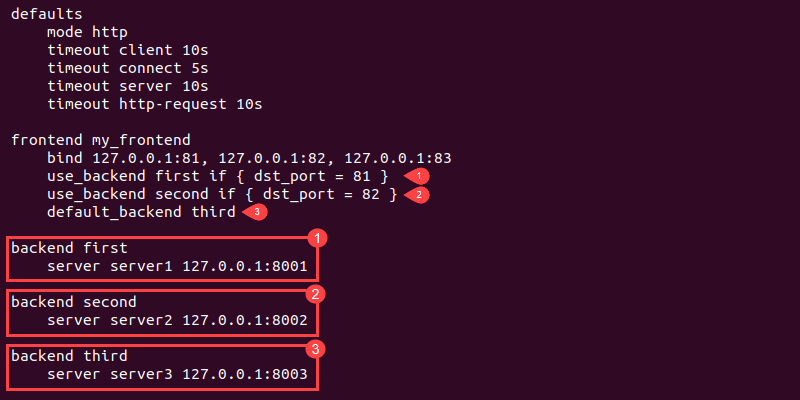
The code does the following:
- Binds the address to three ports (
81,82, and83). - Sets a rule to use the
firstbackend if the destination port is81. - Adds another rule to use the
secondbackend if the destination port is82. - Defines a default backend (
third) for all other cases.
Use multiple backends and rules to forward traffic to different websites or apps.
Monitoring
Use the global and listen sections to monitor the health of all the nodes via a web application. A typical setup looks like the following:
global
    stats socket /run/haproxy/admin.sock mode 660 level admin

defaults
    mode http
    timeout client 10s
    timeout connect 5s
    timeout server 10s
    timeout http-request 10s

frontend my_frontend
    bind 127.0.0.1:80
    default_backend my_backend

backend my_backend
    balance leastconn
    server server1 127.0.0.1:8001
    server server2 127.0.0.1:8002

listen stats
    bind :8000
    stats enable
    stats uri /monitoring
    stats auth username:password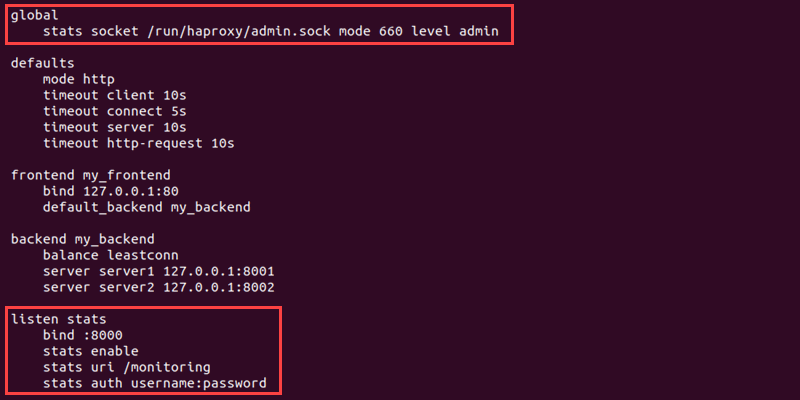
New additions to the file include:
- The
globalsection that enables thestats socketRuntime API. Connecting to the socket allows dynamic server monitoring through a built-in web application. - The
listensection serves the monitoring page on port8000with the URI/monitoringand requires credentials to access the page.
To access the monitoring page:
1. Save the configuration file and restart HAProxy:
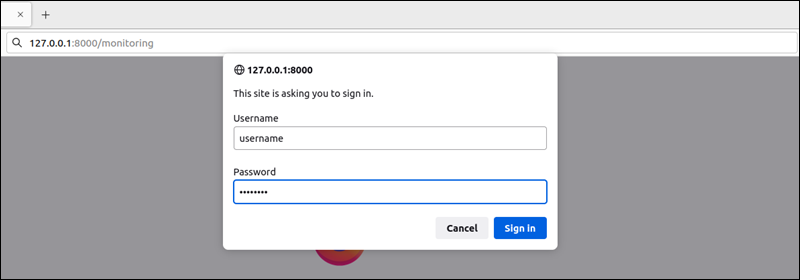
sudo systemctl restart haproxy2. Open a web browser and enter 127.0.0.1:8000/monitoring as a web page address.
3. The page brings up the login window. Enter the credentials provided in the stats auth username:password located in the listen section.
3. The monitoring page displays, showing various statistics for individual nodes.
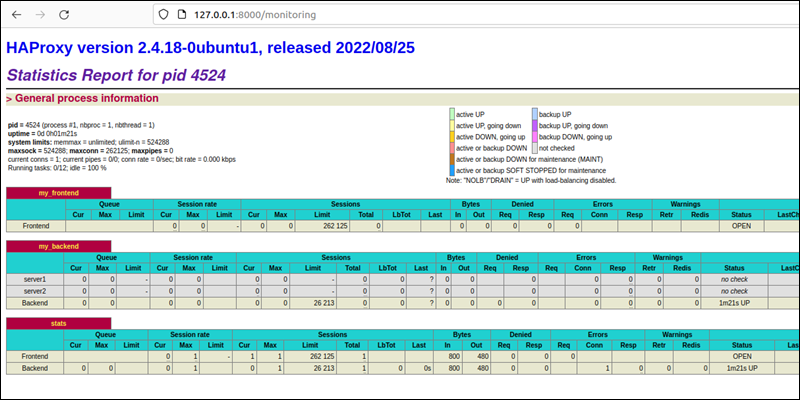
The statistics display detailed information for the frontend and backend sections, while the final table shows the general statistics for both.
Conclusion
After reading this guide, you know how to set up a basic load balancer using HAProxy. The guide showed you how to configure the load balancer, as well as how to monitor all the nodes.
Next, see how you can use a small BMC server instance as a load balancer using HAProxy.