Nginx is a high-performance, open-source web server and reverse proxy essential for modern web applications. Its efficiency and versatility make it a popular choice for handling HTTP requests, load balancing, and serving static content.
This guide will teach you how to install and use Nginx on Ubuntu 24.04.
Prerequisites
- Ubuntu 24.04 installed.
- Command-line access.
- Administrative privileges.
Install Nginx on Ubuntu 24.04
The official Nginx repository contains prebuilt packages for all major Linux distributions, including Ubuntu. Follow the steps below to add the repository to the system and use it to install Nginx.
Note: It is possible to install Nginx from the Ubuntu repository by running sudo apt install nginx. However, this repository may not have the most up-to-date application version.
Step 1: Install Prerequisite Packages
Obtain packages necessary for managing third-party repositories on Ubuntu:
1. Refresh the package list on the system:
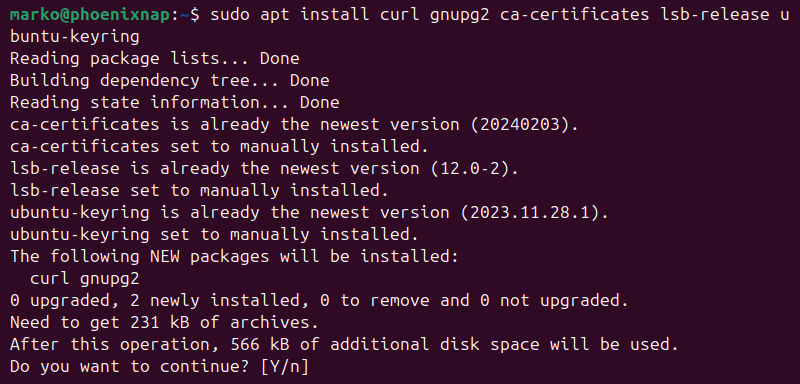
sudo apt update2. Install the packages by entering the following command:
sudo apt install curl gnupg2 ca-certificates lsb-release ubuntu-keyringWhen prompted, enter Y to continue and wait for the installation to finish.
Step 2: Import Nginx Signing Key
APT needs the official Nginx signing key to verify the authenticity of the packages. Import the key by entering the following command:
curl https://nginx.org/keys/nginx_signing.key | gpg --dearmor \
| sudo tee /usr/share/keyrings/nginx-archive-keyring.gpg >/dev/null
Step 3: Set Up Repository
The official Nginx repository contains two package versions:
- Mainline. The version of Nginx with all the newest features and bug fixes. It may contain experimental modules.
- Stable. The version for production servers. Stable packages contain the latest critical bug fixes but do not include the latest features.
Set up the repo for mainline packages by entering:
echo "deb [signed-by=/usr/share/keyrings/nginx-archive-keyring.gpg] \
http://nginx.org/packages/mainline/ubuntu `lsb_release -cs` nginx" \
    | sudo tee /etc/apt/sources.list.d/nginx.list
For stable packages, type the following:
echo "deb [signed-by=/usr/share/keyrings/nginx-archive-keyring.gpg] \
http://nginx.org/packages/ubuntu `lsb_release -cs` nginx" \
    | sudo tee /etc/apt/sources.list.d/nginx.list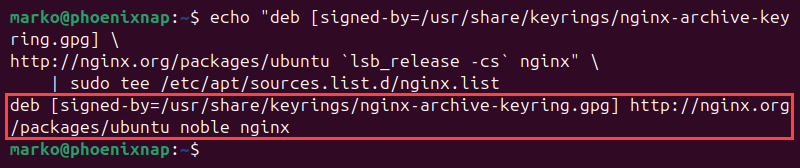
Step 4: Pin Official Repository
Type the following command to ensure that the system prefers the official Nginx packages over the packages the distribution provides:
echo -e "Package: *\nPin: origin nginx.org\nPin: release o=nginx\nPin-Priority: 900\n" \
    | sudo tee /etc/apt/preferences.d/99nginx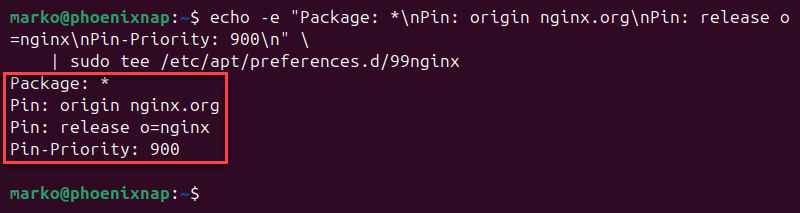
Step 5: Install Nginx
With the official repository set up on the system, deploy Nginx with the commands below:
1. Refresh the package list:
sudo apt update2. Install Nginx:
sudo apt install nginxStep 6: Verify Installation
Check the Nginx version to confirm the installation was successful:
nginx -vThe output returns the version number.

Using Nginx on Ubuntu 24.04
This section shows how to manage the Nginx service on Ubuntu 24.04. Use the instructions below to start Nginx on boot, control the server operation, and configure server blocks for the website hosting.
Enable Nginx to Start on Boot
Type the following command to configure Nginx to start automatically when the system boots up:
<code>sudo systemctl enable nginxTo undo this operation, use the following command:
sudo systemctl disable nginxManage Nginx Service
The easiest way to control the Nginx service on Ubuntu is by using the systemctl commands. Below is a list of commands for performing basic management operations (such as start, stop, restart Nginx):
- Start the service:
sudo systemctl start nginx- Stop the service:
sudo systemctl stop nginx- Stop the service and start it again immediately:
sudo systemctl restart nginx- Apply configuration changes without disrupting active server connections:
sudo systemctl reload nginx- See the service status:
sudo systemctl status nginx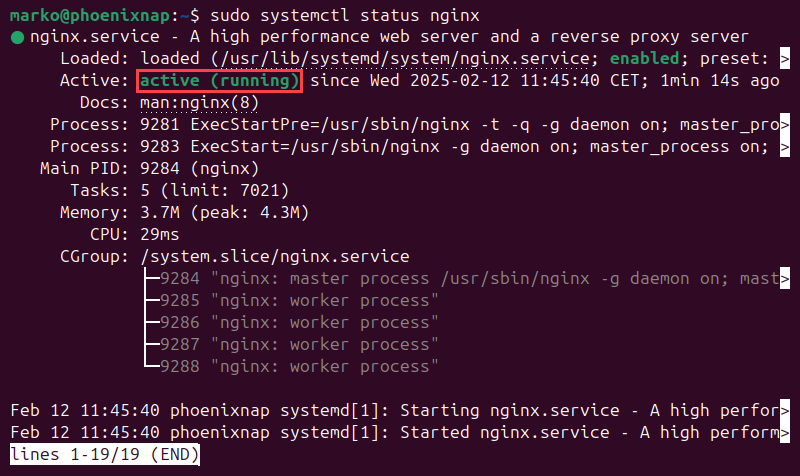
Define Server Blocks
Nginx is designed to act as a front for multiple servers, which is done by creating server blocks. Server block configuration files are located at /etc/nginx/sites-available.
See the contents of the default server block configuration file by entering the following command in a terminal:
sudo nano /etc/nginx/sites-available/default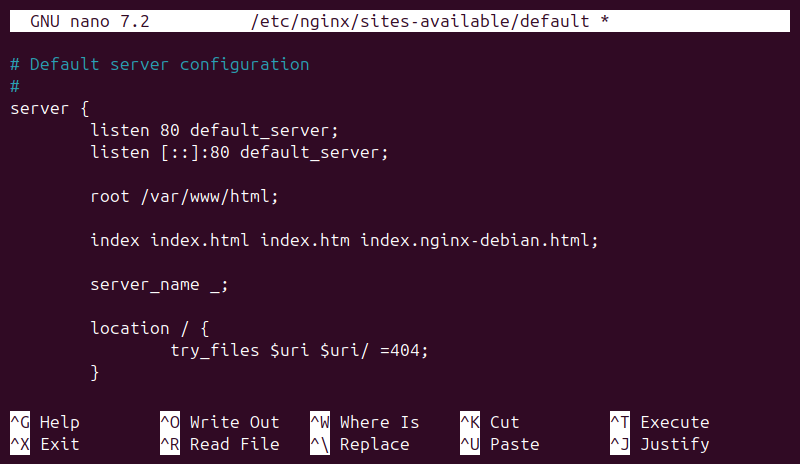
A typical server block consists of the following parameters:
| Directive | Description |
|---|---|
| listen | Tells Nginx which ports to listen to for traffic. The default_server is the block to be delivered unless otherwise specified by the client. |
| root | Determines the root directory for the served website. |
| server_name | Allows the user to specify a name for a particular server block. Used in more advanced configurations. |
| location | Defines how Nginx handles requests for specific URIs or URI patterns. |
Create Sample Server Block
This section demonstrates how to create a sample Nginx server block for website hosting. It explains how to configure a virtual host, specify the root directory for website files, and define the server name.
Follow the steps below to configure an Nginx server block in Ubuntu:
1. Create a website directory:
sudo mkdir /var/www/example2. Use a text editor such as Nano to create an HTML file:
sudo nano /var/www/example/index.html3. Paste the following contents into the file:
<!DOCTYPE html>
<html lang="en">
<head>
    <meta charset="UTF-8">
    <meta name="viewport" content="width=device-width, initial-scale=1.0">
    <title>Example Page</title>
</head>
<body>
    <h1>Welcome to the Example Page</h1>
    <p>This is an example page to demonstrate working with Nginx in Ubuntu 24.04.</p>
</body>
</html>
4. Save the file and exit.
5. Create a new server block file:
sudo nano /etc/nginx/sites-available/example.local6. Paste the following code into the file:
server {
listen 80;
root /var/www/example;
index index.html;
server_name localhost;
}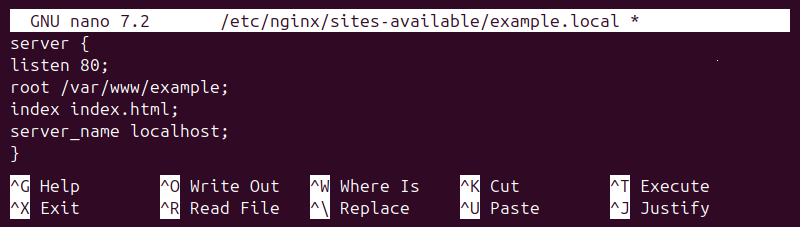
The code tells Nginx to look in the /var/www/example directory for the files to serve and to use the index.html file as the front page for the website.
7. Save the file and exit.
8. Create a symlink from the file in the sites-available directory to the sites-enabled directory:
sudo ln -s /s /etc/nginx/sites-available/example.local /etc/nginx/sites-enabled9. Restart the Nginx service to apply the changes:
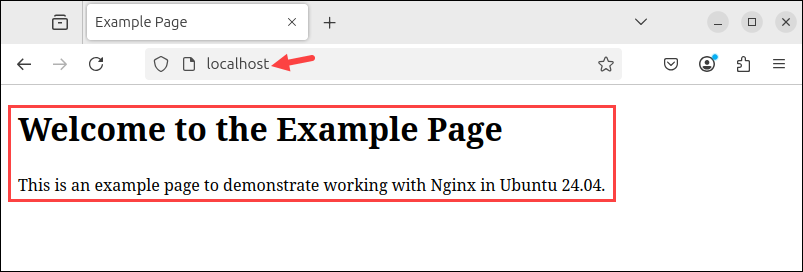
sudo systemctl restart nginx10. In a browser window, type:
localhostNginx intercepts the request and displays the test HTML file.
Securing Nginx on Ubuntu 24.04
The following section explains how to make an Nginx deployment more secure on Ubuntu 24.04. It includes steps for installing an SSL certificate and setting up UFW firewall rules.
Install SSL Certificate (Let's Encrypt)
SSL certificates enable encrypting communication between the server and its visitors, improving website security and user trust. Follow the steps below to install a free SSL certificate from Let's Encrypt:
1. Refresh the package list:
sudo apt update2. Install the required packages:
sudo apt install certbot python3-certbot-nginx3. Use the certbot command to issue a free certificate. Provide the domain name as an argument to the -d option.
sudo certbot --nginx -d [domain]Since Let's Encrypt certificates expire every 90 days, Nginx recommends setting up an automatic renewal cron job.
Create a Cronjob
To create a cron job for automatic renewal:
1. Open the crontab configuration file for the current user:
crontab -e2. Add a cron job that runs the certbot renew command:
0 5 * * * /usr/bin/certbot renew --quietThe command performs renewal if it detects the certificate will expire within 30 days. Schedule it to run daily at a specified time (in the example above, it runs at 5:00 a.m.)
Add Firewall Rules
Use a firewall to control traffic from and to the Nginx web server. The steps below show how to set up UFW to allow listening on port 80:
1. List the available applications in UFW:
sudo ufw app list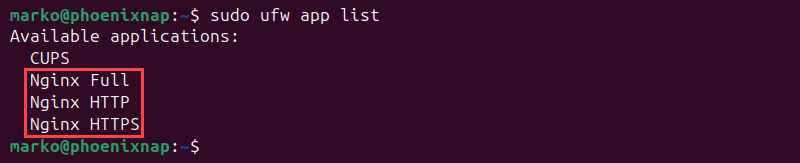
UFW generates a list of application profiles. On the list, there are three entries related to Nginx:
- Nginx Full opens Port 80 for normal web traffic and Port 443 for secure encrypted web traffic.
- Nginx HTTP opens Port 80 for normal web traffic.
- Nginx HTTPS opens Port 443 for encrypted web traffic.
2. Type the command below to activate the Nginx HTTP profile that allows unencrypted HTTP traffic to an Nginx server:
sudo ufw allow 'Nginx HTTP'The output confirms that the rules have been updated.

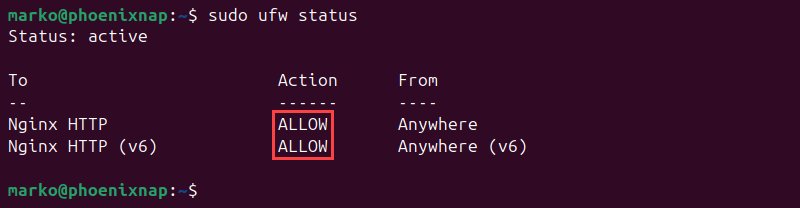
3. Check the status of your firewall with the following command:
sudo ufw statusUFW shows Nginx HTTP web traffic as allowed.
Note: To open a custom port number in UFW, type sudo ufw allow [port]/[protocol], e.g., sudo ufw allow 8080/tcp.
Important Nginx Files & Directories
Effective Nginx administration requires familiarity with key files and directories, which manage configuration, process control, application integration, and web content.
The table below contains a selection of the essential Nginx files and directories:
| Item | Description |
|---|---|
| nginx.conf | The main configuration file for Nginx, typically located in /etc/nginx. |
| mime.types | The file that maps file extensions to MIME types and helps Nginx understand how to handle different file types. |
| /run/nginx.pid | The FastCGI parameters file. FastCGI protocol allows web servers to communicate with backend applications, often used for languages like PHP. Typically defines variables like SCRIPT_FILENAME, and DOCUMENT_ROOT. |
| fastcgi_params | The FastCGI parameters file. FastCGI protocol allows web servers to communicate with backend applications, often used for languages like PHP. Typically defines variables like SCRIPT_FILENAME, and DOCUMENT_ROOT. |
| uwsgi_params | The uWSGI parameters file. uWSGI is a protocol and server implementation for web application deployment, especially in Python. The file defines uWSGI server settings like socket paths and application paths. |
| scgi_params | The SCGI parameters file. Defines the necessary parameters for the SCGI application, like request method and content length. |
| sites-available/ | The directory containing all available server block configurations. |
| sites-enabled/ | The directory with symbolic links to the currently enabled configurations. |
| /var/www/html/ | The directory storing web files for the default server block, served when the server's IP address is accessed directly. |
| /var/log/nginx/ | Logs directory. |
Conclusion
This guide explained how to install and configure Nginx on Ubuntu 24.04. It also included instructions on how to make your Nginx deployment more secure.
If you are still deciding which web server to use, read How to Install Apache Web Server on Ubuntu and test Apache's capabilities.